Install and Set Up MySQL with ease using this comprehensive guide. MySQL is a highly popular open-source relational database management system (RDBMS) widely used for web development, software applications, and robust data storage solutions. Its reliability, performance, and ease of use make it a go-to choice for developers, analysts, and students alike. If you’re looking to install MySQL on a Windows machine, this comprehensive guide will walk you through each step, providing practical examples and troubleshooting advice. By the end, you’ll have MySQL fully installed, configured, and ready for your projects.
Step 1: Download the MySQL Installer
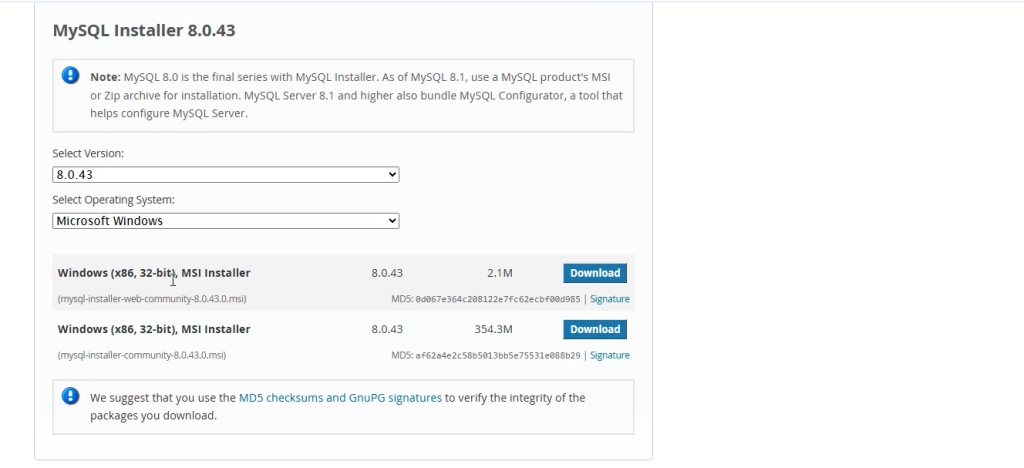
Start by visiting the official MySQL Downloads page. Here, you’ll find two installer options:
- Web Installer: A lightweight file that downloads only the necessary components during installation. Recommended if you have a stable internet connection.
- Full Installer: A larger file containing all components, ideal if you want an offline installation.
For most users, the Web Installer is sufficient and saves time.

Step 2: Launch the Installer and Choose Setup Type
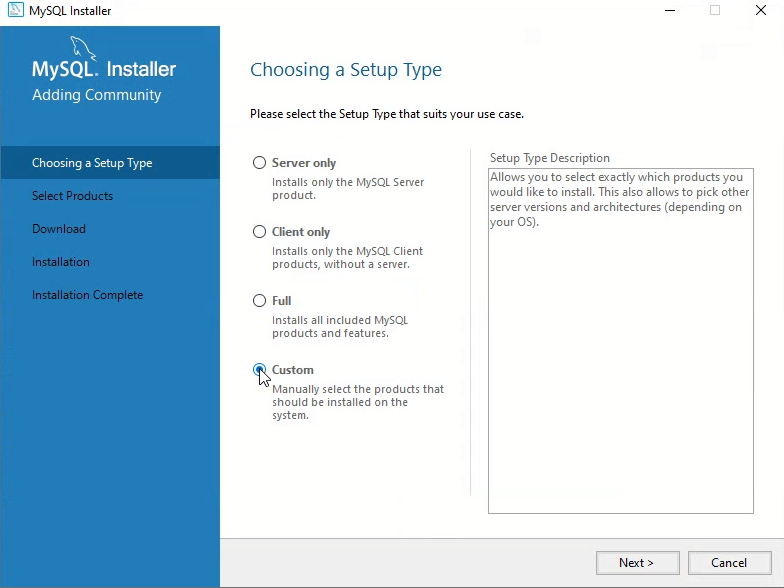
Once the installer (.msi file) downloads, double-click to launch it. You’ll be presented with several setup options to Install and Set Up MySQL:
- Developer Default: Installs the most common MySQL tools, including MySQL Server, Workbench, Shell, and other utilities. This is recommended for most users.
- Server Only: Installs just the MySQL server.
- Client Only: Installs only client tools, not the server.
- Full: Installs every available MySQL product and tool.
- Custom: Lets you pick exactly what you want.
Select Full for a well-rounded experience or Custom to select tools manually, then click Next to proceed.
Step 3: Installing MySQL Server and Required Components
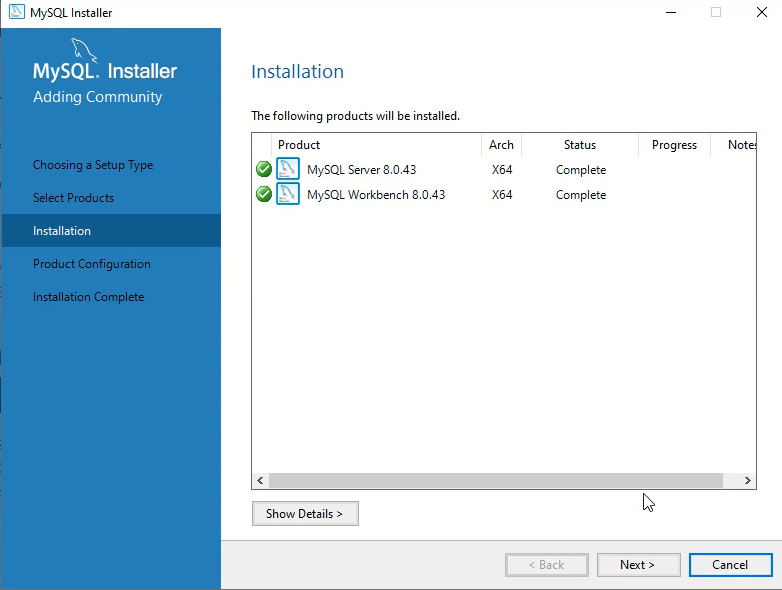
Before installation, the installer checks for prerequisites like the Visual C++ Redistributable. If anything is missing, the installer will download and install it automatically. Click Execute to start downloading and installing MySQL and its components. Depending on your internet speed, this process may take several minutes.
Step 4: Configuring MySQL Server
After installation, you’ll be prompted to configure the server. Key settings include:
- High Availability: Select Standalone MySQL Server (typical for most single-computer setups).
- Type and Networking: Set the configuration type to Development Computer and leave the default port at 3306. Ensure TCP/IP networking is enabled.
- Authentication Method: Opt for Strong Password Encryption (recommended for security).
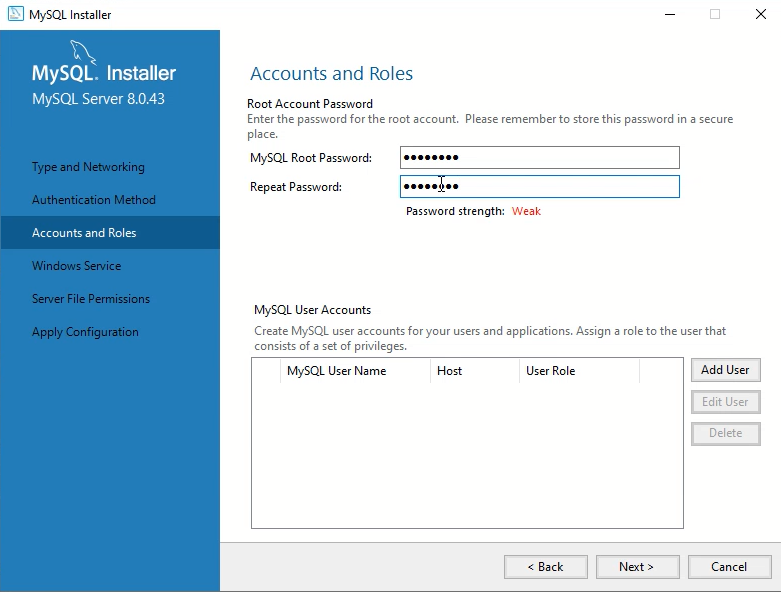
- Root Password: Create a robust password for the MySQL root account (e.g., MySQL@2025!). Keep this password in a safe place—you’ll need it to log in.
Step 5: Setting Up as a Windows Service
To make MySQL run seamlessly in the background, choose to install it as a Windows Service. Ensure the option to Start the MySQL Server at System Startup is enabled. After reviewing your settings, click Next and then Execute to apply the configuration.
Step 6: Connecting to the MySQL Server
Upon completion, the installer will offer to launch MySQL Workbench and MySQL Shell :
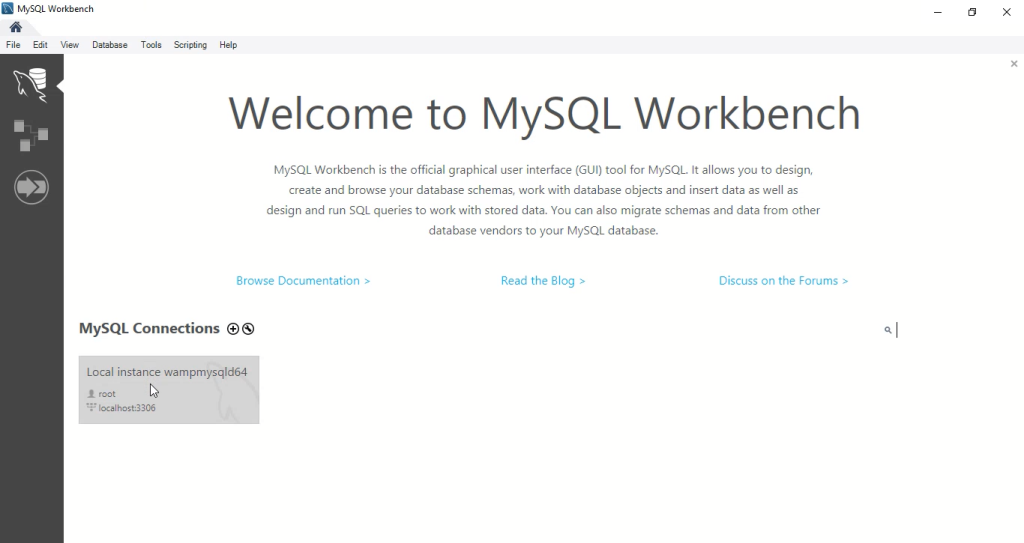
- Open MySQL Workbench.
- On the home screen, you’ll see a connection named Local instance MySQL.
- Click it and enter your root password.
- Once logged in, you can browse databases, run SQL queries, and manage server settings visually.
Example: To list all databases, enter the following SQL statement:
SHOW DATABASES;
You’ll see default databases like information_schema, mysql, and performance_schema.
Step 7: Creating Your First Database and Table
Let’s create a simple database and table as a test:
CREATE DATABASE test_db;
USE test_db;

CREATE TABLE users (
    id INT AUTO_INCREMENT PRIMARY KEY,
    name VARCHAR(50),
    email VARCHAR(50)
);

INSERT INTO users (name, email) VALUES ('John Doe', 'john@example.com');
SELECT * FROM users;
This sequence creates a database, adds a table named users, inserts a sample record, and displays the data, confirming your MySQL installation works correctly.
Troubleshooting Common Issues
- Port 3306 Blocked: If the installer reports that port 3306 is in use, ensure no other application is using it or reassign MySQL to a different port.
- Forgotten Root Password: Use MySQL Workbench’s password reset features or consult the official documentation.
- Service Won’t Start: Restart the MySQL service via the Windows Services Manager. Check for any conflicting processes or permissions issues.
Conclusion: Successfully Install and Set Up MySQL
By following these steps, you’ve learned how to Install and Set Up MySQL, and you’ll have a fully functioning MySQL database environment on your Windows computer. MySQL’s versatility and support make it a powerful tool for managing data, building applications, or learning more about databases. Whether you’re developing websites, analyzing data, or experimenting as a student, you now have a solid foundation to begin your MySQL journey.
📌 Watch the full video here: https://www.youtube.com/watch?v=A6GUApkCcn8