Microsoft SQL Server (MS SQL) is a leading relational database management system (RDBMS) widely adopted in enterprise environments. For developers, database administrators, and IT professionals, installing and configuring MS SQL Server on Windows is essential for building a robust and reliable database infrastructure. This guide provides clear, step-by-step instructions to install and set up MS SQL Server on Windows, including helpful tips and practical examples.
Prerequisites to Install and Set Up MS SQL Server
Before you begin, make sure your Windows system meets these requirements:
- Operating System: Windows 10/11 or Windows Server 2016/2019/2022
- Memory: Minimum 2 GB RAM (4 GB or more recommended)
- Storage: At least 10 GB free disk space
- .NET Framework: Version 4.6 or newer
Tip: Always download the latest version to install and set up MS SQL Server from the official Microsoft website to ensure compatibility and security.
Step 1: Download MS SQL Server
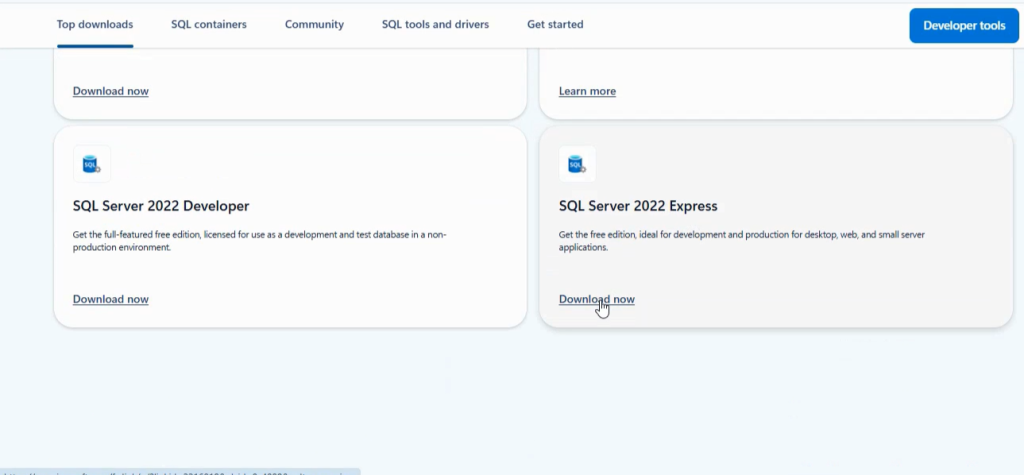
- Go to the Microsoft SQL Server downloads page.
- Select the appropriate edition:
- Developer Edition: Free and full-featured, ideal for development and testing.
- Express Edition: Free, lightweight version for small-scale applications.
- Download the installer (SQL Server Installation Center).
Tip: For learning or practice, the Developer Edition is recommended.
Step 2: Start the Installation Wizard
- Run the downloaded installer (e.g., SSEI-Dev.exe).
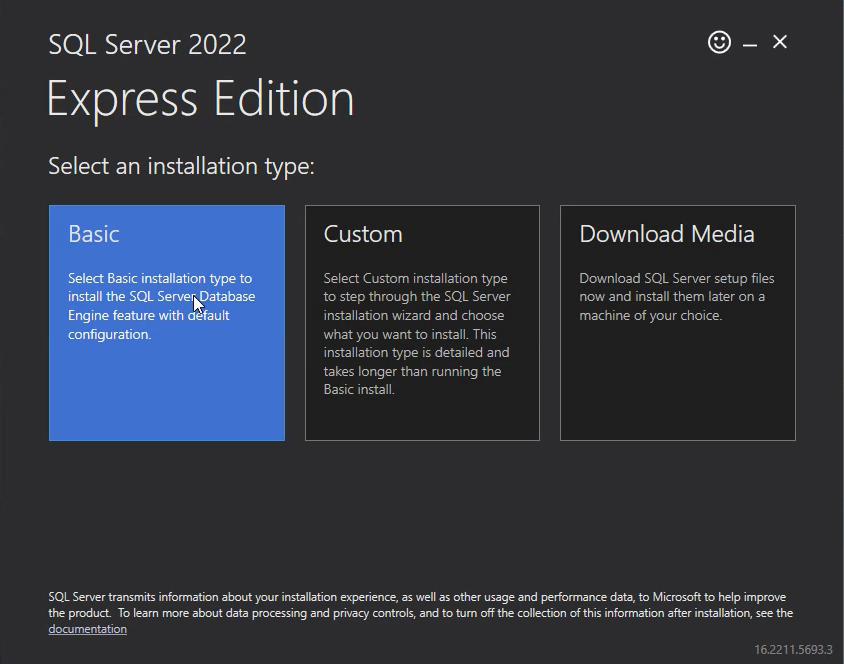
- Choose from three installation types:
- Basic: Quick install with default settings.
- Custom: Lets you choose features and installation paths.
- Download Media: For creating an ISO/EXE for offline installation.
- Select Custom for more control over the installation process.
Step 3: Install SQL Server
- In SQL Server Installation Center, click New SQL Server stand-alone installation.
- Accept the license terms and click Next.
- The installer will perform a system check.
- Feature Selection: Choose required components (e.g., Database Engine Services, SQL Server Replication).
- Instance Configuration: Select Default Instance or create a Named Instance.
- Server Configuration: Assign service accounts (default is suitable for local setups).
- Database Engine Configuration:
- Choose Mixed Mode authentication for flexibility.
- Set a strong SA (System Administrator) password.
- Add yourself as a SQL Server administrator.
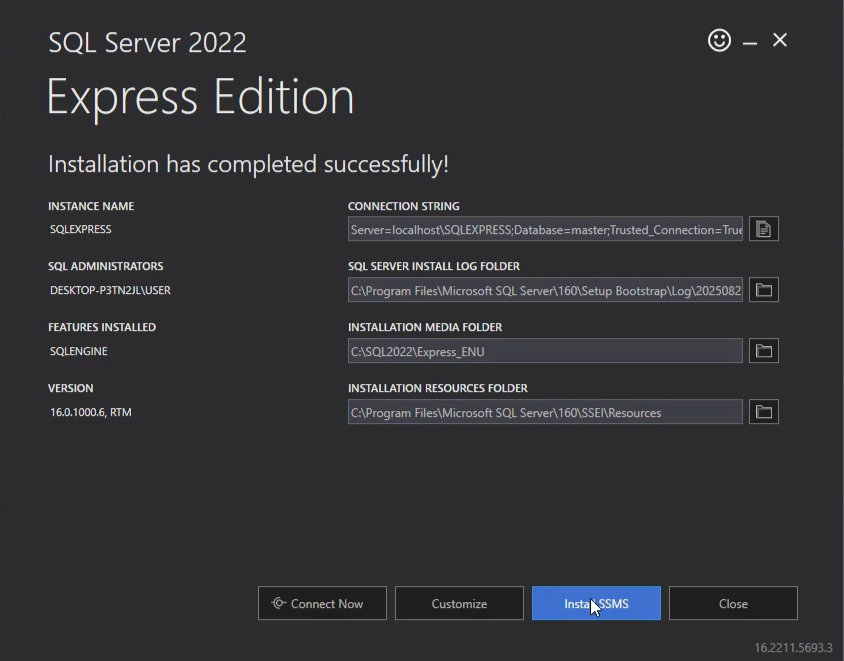
- Click Install and wait for the setup to finish.
Step 4: Install SQL Server Management Studio (SSMS)
- Download SSMS from the official download page.
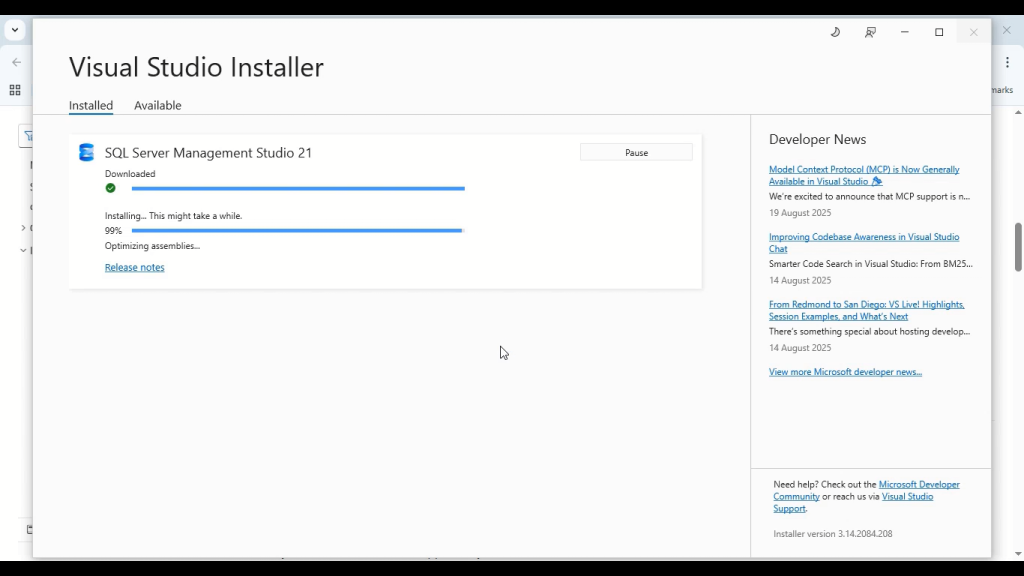
- Run the SSMS installer and follow the prompts.
- After installation, open SQL Server Management Studio.
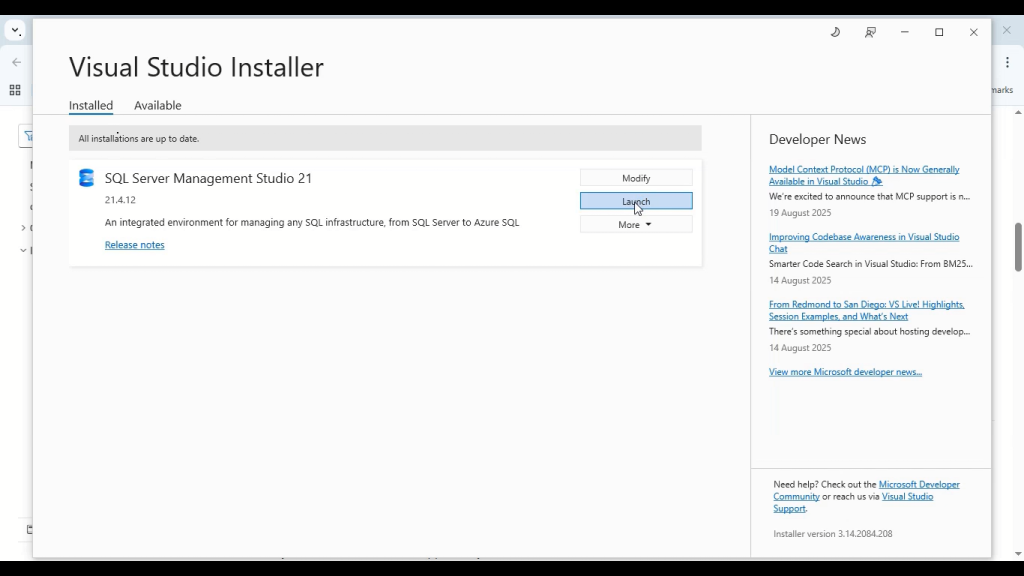
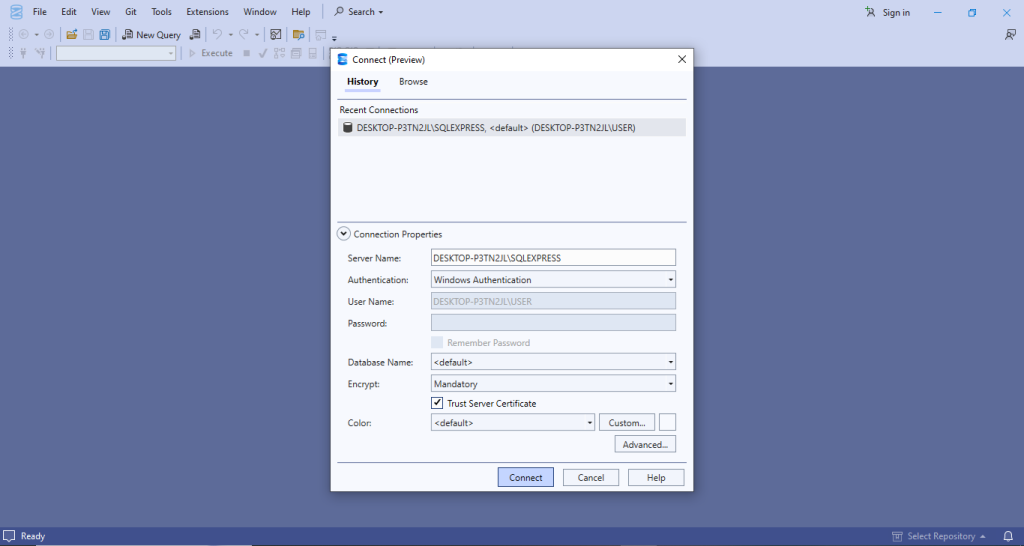
Step 5: Connect to SQL Server with SSMS
- Launch SSMS.
- In the Connect to Server dialog, enter:
- Server Type: Database Engine
- Server Name: (local) or your PC’s name (e.g., DESKTOP-1234\MSSQLSERVER)
- Authentication: Windows Authentication or SQL Server Authentication (if enabled)
- Click Connect to access your instance.
Step 6: Create a Test Database
- Open a New Query window in SSMS.
- Run the following SQL script to create a sample database and table:
CREATE DATABASE TestDB;
GO
USE TestDB;
CREATE TABLE Employees (
    EmployeeID INT PRIMARY KEY IDENTITY,
    FirstName NVARCHAR(50),
    LastName NVARCHAR(50),
    HireDate DATE
);
GO
INSERT INTO Employees (FirstName, LastName, HireDate)
VALUES ('John', 'Doe', '2023-01-15');
SELECT * FROM Employees;
- Execute the script to see the new database and sample data in the results pane.
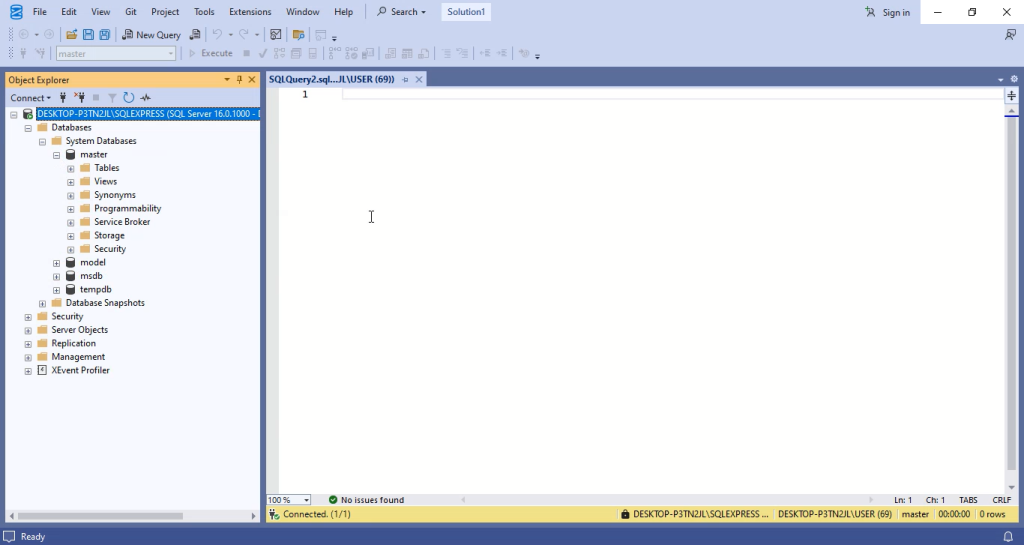
Step 7: Verify Installation and Apply Best Practices
- Ensure all SQL Server services are running via SQL Server Configuration Manager.
- If remote connections are needed, enable TCP/IP Protocols under SQL Server Network Configuration.
- Regularly update both SQL Server and SSMS with the latest patches from Microsoft.
Common Troubleshooting
- Cannot connect to SQL Server: Check if the SQL Server service is running in
services.msc. - Login failed errors: Ensure you enabled Mixed Mode Authentication if using SQL logins.
- Firewall issues: Allow SQL Server through Windows Firewall, especially for remote connections.
Conclusion
By following these steps, you can successfully install and set up MS SQL Server and SQL Server Management Studio on Windows. This setup provides a powerful and scalable environment for data storage, management, and application development—suitable for both beginners and advanced users.