Azure Data Factory (ADF) is a cloud-based data integration service that enables you to design, schedule, and manage data pipelines efficiently. One of the fundamental tasks is to create a pipeline and Copy Data in ADF, which allows you to transfer data seamlessly between different systems.
This guide provides a step-by-step process to create a pipeline and Copy Data in ADF.
Introduction to Pipeline and Copy Data Activity in ADF
Before learning how to create a pipeline and copy data in ADF, let’s clarify what a pipeline is.
A pipeline in Azure Data Factory is a logical grouping of activities that perform a specific workflow. It orchestrates the movement and transformation of data across various sources and destinations.
Examples of pipeline use cases include:
- Copying data from an on-premises SQL Server to Azure Blob Storage.
- Moving files between folders in Azure Data Lake Storage.
Each activity in a pipeline has a specific purpose. The Copy Data activity is commonly used for efficient data transfer.
Access the Azure Data Factory Portal
- Sign in to the Azure Portal.
- Navigate to Data Factories and select your ADF instance.
- Click on Author to open the ADF Studio interface.
Step 1: Create a New Pipeline
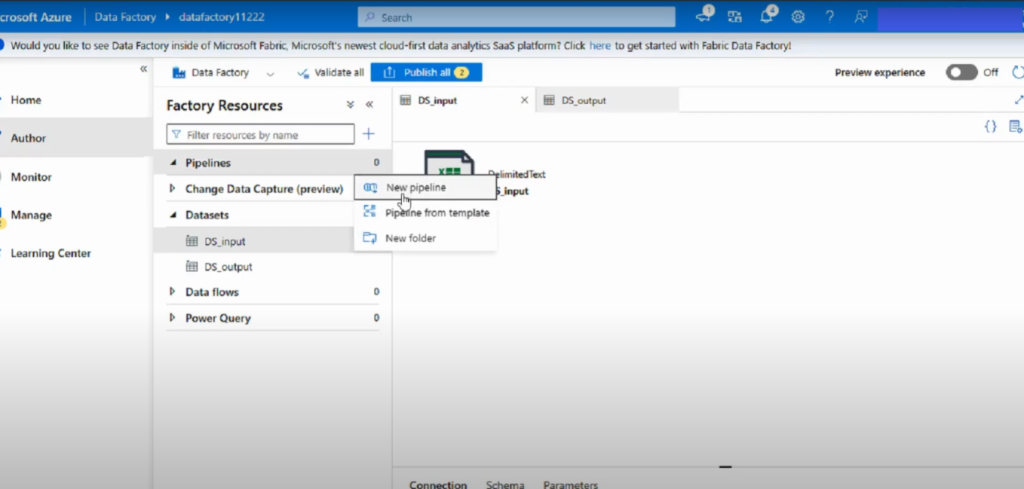
- In the left navigation pane, click the Author (pencil) icon.
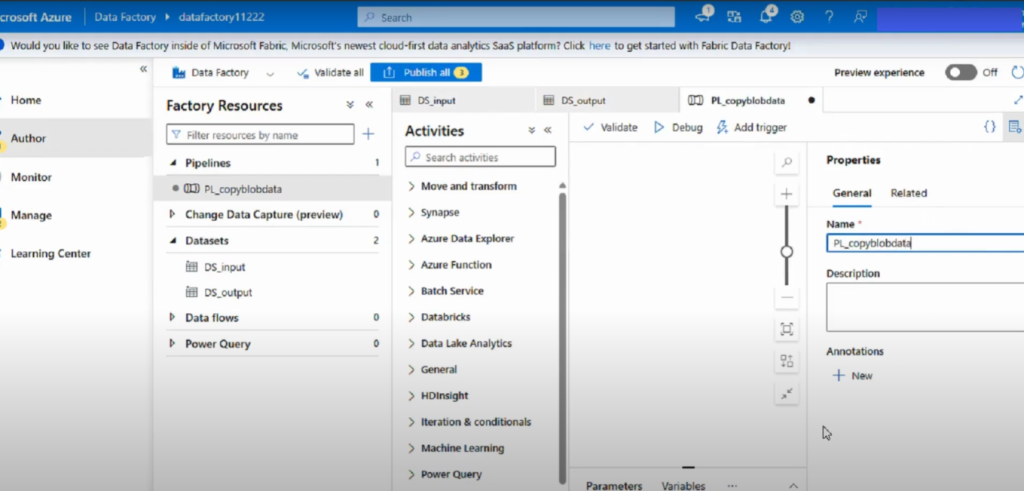
- Under Factory Resources, select Pipelines and choose New pipeline.
- Enter a descriptive name for your pipeline (e.g., CopyDataPipeline).
Step 2: Add a Copy Data Activity
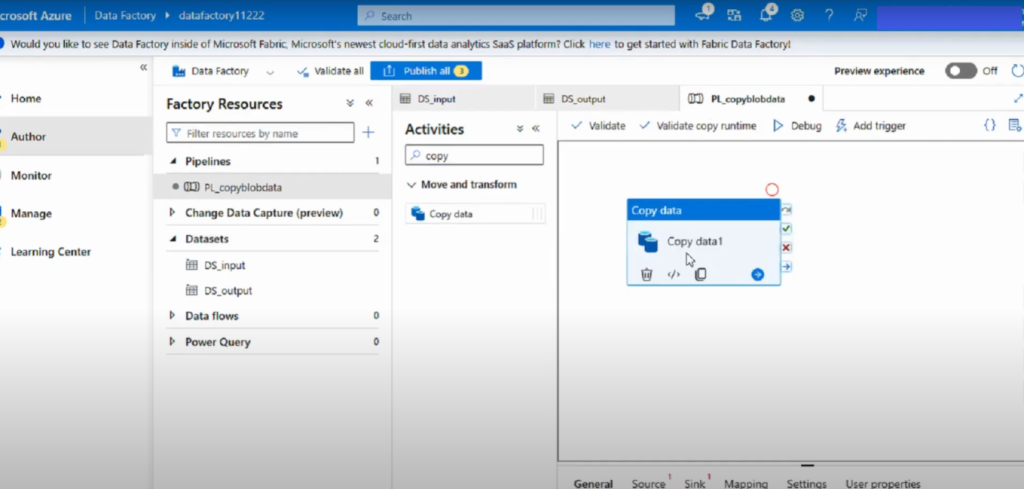
- In the Activities pane, search for Copy data.
- Drag the Copy Data activity onto the pipeline canvas.
- Assign a clear name, such as CopySQLtoBlob.
Step 3: Set Up the Source Dataset
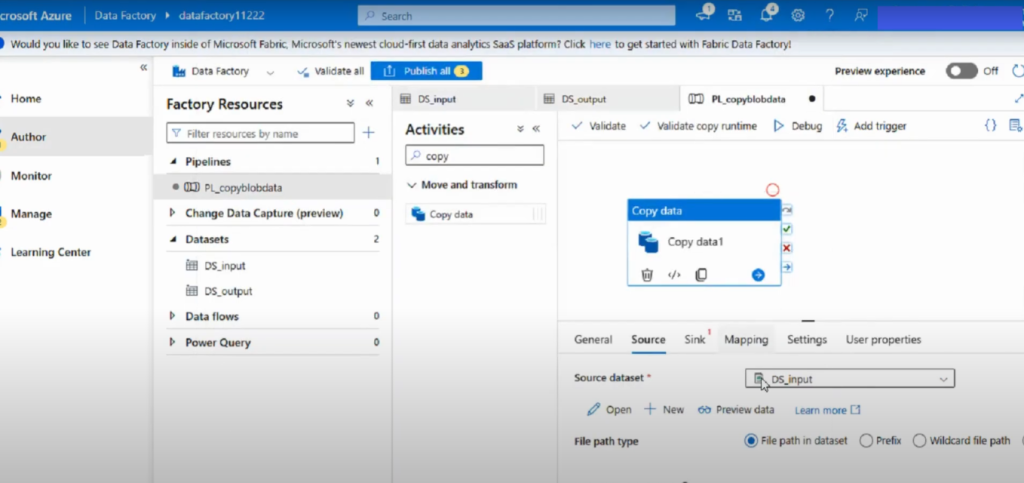
- Select the Copy Data activity and open the Source tab.
- Click + New to create a new dataset and select your source type (e.g., Azure SQL Database).
- Enter connection details (such as server name, database, and authentication) and test the connection.
- Specify the source table or provide a query.
- If you have an existing dataset, select the one pointing to your input container (e.g., a CSV file) and preview the data to verify correctness.
Step 4: Set Up the Sink Dataset
- Switch to the Sink tab of the Copy Data activity.
- Click + New to create a destination dataset and select the sink type (e.g., Azure Blob Storage).
- Provide the necessary connection information (storage account, container, folder, filename) and choose the file format (CSV, Parquet, JSON, etc.).
- If a dataset already exists, select the one pointing to your output container where the copied file will be stored.
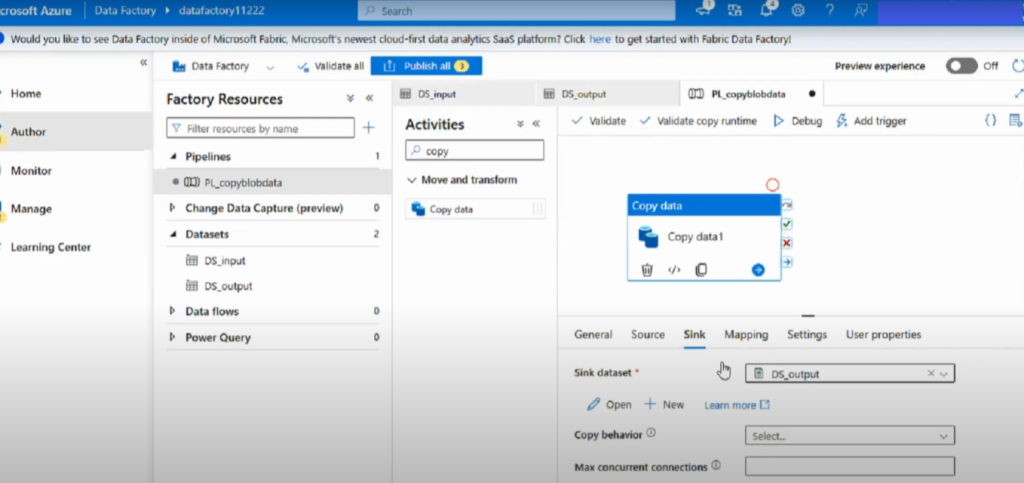
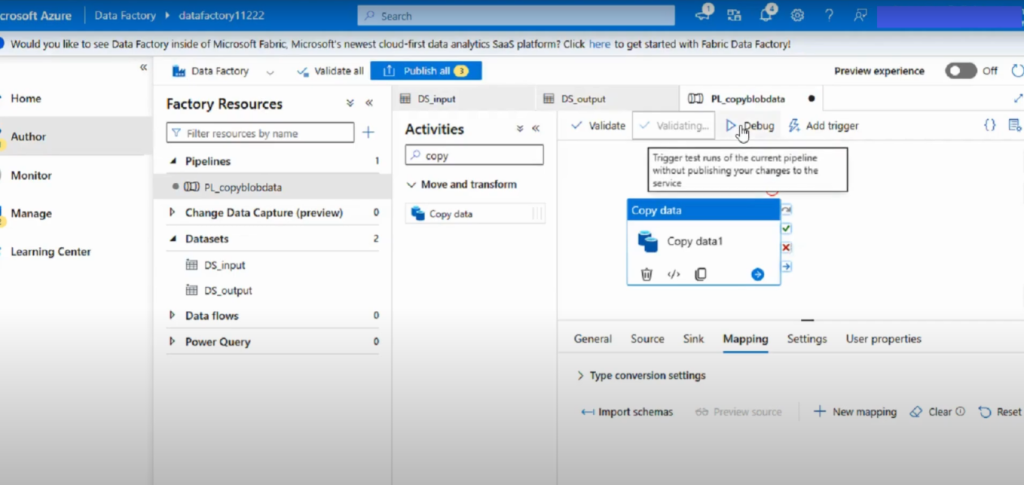
Step 5: Validate, Debug, and Publish
- Click Validate All to check for configuration errors.
- Use Debug to test-run the pipeline.
- Once testing is successful, click Publish All to deploy your pipeline.
Step 6: Trigger and Monitor the Pipeline
- After publishing, trigger the pipeline to start the data transfer.
- Once the run is complete, verify the output file at the destination (e.g., Azure Blob Storage).
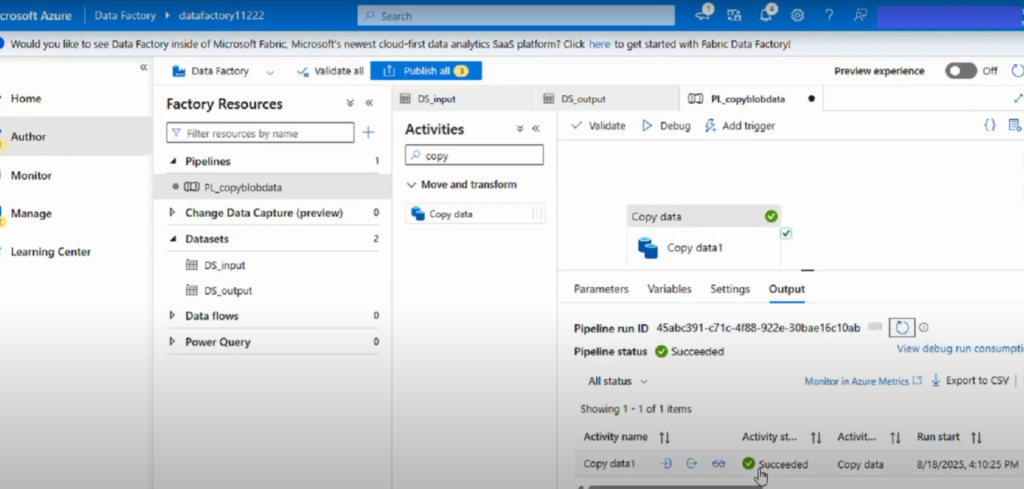
Best Practices to Create a Pipeline and Copy Data in ADF
To make the most of how to create a pipeline and copy data in ADF, follow these best practices:
- Always use parameterized datasets for reusability.
- Implement logging and monitoring for troubleshooting.
- Secure sensitive credentials using Azure Key Vault.
- Use debug mode before publishing pipelines.
- Organize activities with meaningful names for easy maintenance.
Conclusion
Creating and configuring a pipeline with a Copy Data activity in Azure Data Factory involves these key steps:
- Create a new pipeline.
- Add and configure a Copy Data activity.
- Define source and sink datasets.
- Validate, debug, and publish your pipeline.
- Trigger and monitor the data transfer.
This approach provides a flexible and scalable way to securely move data between different cloud and on-premises systems.
📌 Watch the full video here: https://www.youtube.com/watch?v=O0O_iz2jnlg&t=2s