Blob Storage and CSV Upload in ADF is a core step in building reliable data pipelines. Azure Data Factory (ADF) relies on Azure Blob Storage as a core component for managing data pipelines—from ingesting raw files to storing processed outputs. Establishing a well-structured storage foundation is key before designing your pipelines.
This guide walks you through the essential steps: creating an Azure Storage Account, setting up two blob containers (one for input and one for output), and uploading a sample CSV file to the input container. This prepares your environment for building robust ADF pipelines.
Step 1: Create an Azure Storage Account
A Storage Account is the primary resource in Azure for storing data. Every file you process with ADF resides here.
To create a Storage Account:
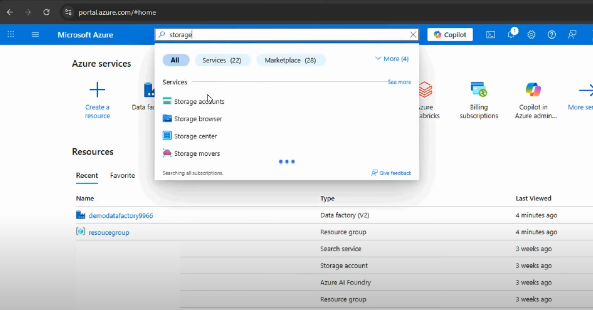
- Log in to the Azure Portal.
- Search for Storage Accounts and click + Create.
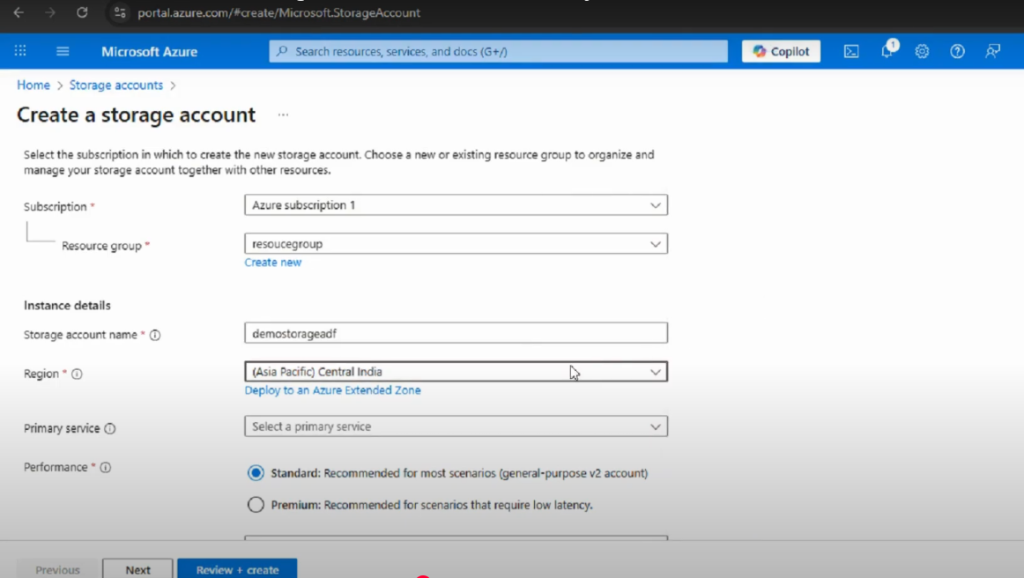
- Choose the relevant Subscription and Resource Group (create a new one if needed).
- Enter a unique Storage Account Name (e.g., demostorageadf).
- Select a Region close to your data sources.
- Set Performance to Standard and Redundancy to the default (LRS).
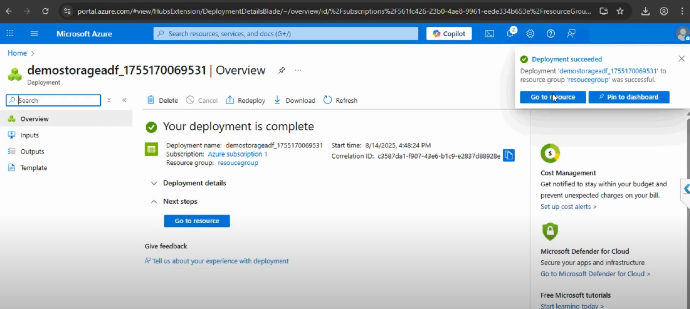
- Click Review + Create, then Create to deploy.
Once deployment is complete, your Storage Account is ready to host blob containers and data files. This will serve as the backbone for storing and retrieving data in ADF pipelines.
Step 2: Create Blob Containers
Inside your storage account, you’ll organize your files using Blob Containers. Think of them like folders inside a warehouse: each container has a purpose and helps maintain order.
Within your Storage Account, create two blob containers:
- input: For raw or incoming files (e.g., sample.csv).
- output: For files generated or processed by ADF pipelines.
To create containers:
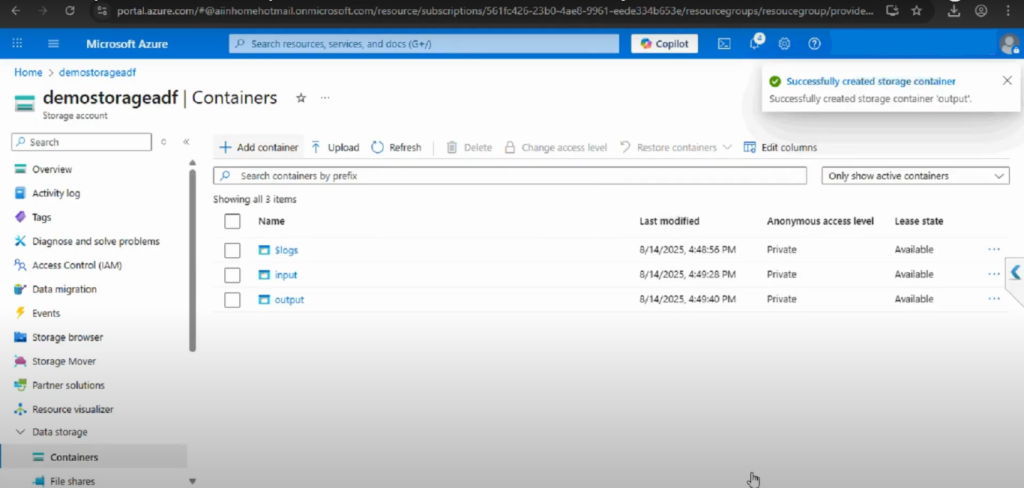
- Open your Storage Account in the Azure Portal.
- Click Containers under Data Storage.
- Click + Add Container.
- Name the first container input and set Public access level to Private.
- Click Create.
- Repeat to create another container named output.
You’ll now have the following structure:
Storage Account: demostorageadf
   ├── input
   └── output
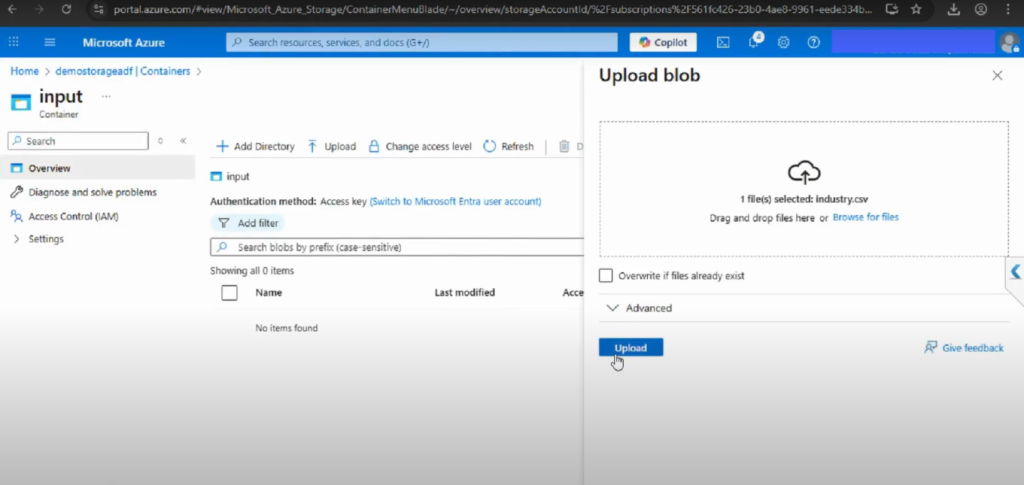
Step 3: Upload a CSV File to the Input Container
With the input container in place, you can upload your sample CSV file:
- Select the input container.
- Click Upload.
- Browse your computer for sample.csv.
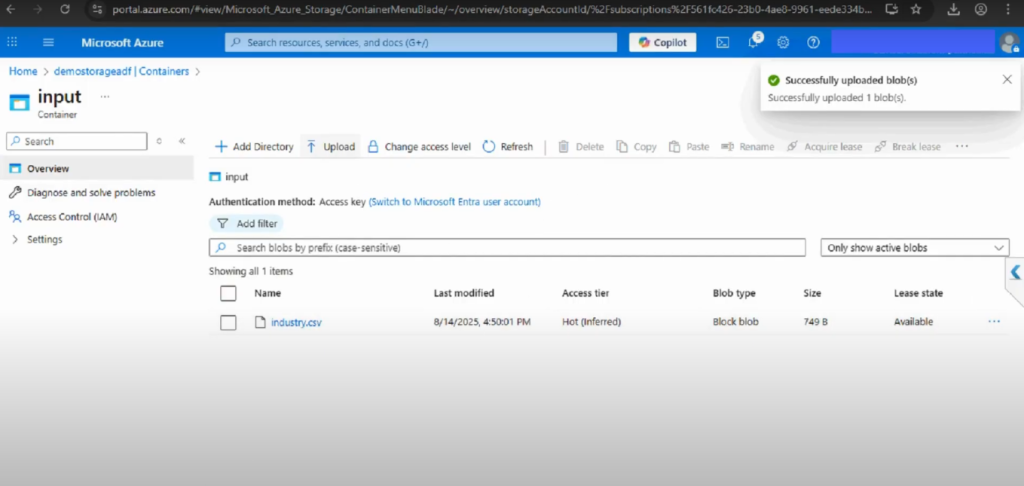
- Click Upload to add the file.
Your CSV file is now ready in the input container for use in ADF pipelines. The output container will remain empty until pipelines generate processed files.
Additional Best Practices for Blob Storage and CSV Upload in ADF
- Naming conventions: Use lowercase, descriptive, and consistent names (e.g., sales_input, etl_output).
- Security first: Always restrict access to private. Store all access keys and credentials securely in Azure Key Vault.
- Scalability: Containers can store billions of objects. Design a clear hierarchy from the start to maintain organization as data volume increases.
Why Use Separate Input and Output Containers?
Maintaining distinct containers for input and output is a recommended best practice. This separation:
- Organizes raw and processed data logically
- Prevents accidental overwrites or data mixing
- Simplifies monitoring and troubleshooting
- Supports scalable data lake architecture as your needs grow
Conclusion
You’ve now established the groundwork for working with Azure Data Factory:
- Created an Azure Storage Account
- Set up input and output blob containers
- Uploaded a sample CSV file to the input container
By creating a Storage Account and configuring input/output containers, you have laid the groundwork for enterprise-grade data integration in Azure. Uploading a simple CSV file may appear trivial, but it represents the first handshake between your data and Azure Data Factory.
From this foundation, you can expand into linked services, datasets, and pipelines, confident that your storage layer is designed for both today’s workflows and tomorrow’s scalability demands.
Chapter-1: Create a Blob Storage in ADF
📌 Watch the full video here: https://www.youtube.com/watch?v=4gXXNliwhQ0
Chapter-2: Upload a CSV file in Input Container in ADF
📌 Watch the full video here: https://www.youtube.com/watch?v=mt7oFAkC3dE